1-Wanda-craftymule-navbar-message
Showing posts with label Christmas. Show all posts

Thursday, October 11, 2018

Soldered Christmas Ornaments

Recently, I informed you that I have picked up soldering again after years of being away from this medium.  I wanted to deviate a bit from jewelry this time around, so I made some soldered Christmas ornaments.  Both the front back of the ornaments depict Christmas themes so they will look pretty hanging from the tree when viewed in any direction.  Here are a few of them:

Retro 30's Ornament - Front

Retro 30's Ornament - Back

Santa Ornament - Front

Santa Ornament - Back

Victorian Girl Ornament - Front


Victorian Woman Ornament - Front

Snow Scene Ornament - Front
Singing Family Ornament - Front
Singing Family Ornament - Back
 
For added sparkle and interest, prior to soldering, I embellished several of the images with glitter glue. The solder was also colorized and a Christmas charm was attached to the front of the ornament. A complementary ribbon hanger was added for the final finish.

All of the ornaments are being listed on Etsy this week. You can easily get to my Etsy shop by clicking the "shop" link header at the top of this page or on the link in this paragraph.


Wednesday, October 10, 2018

Merry Christmas Sale - 3 Days Only!


As a way of saying thank you to all of my customers - new and not so new - I am offering a 3 day sale of 25% off everything site-wide at my Etsy* and EBay shops.  This is a great way to purchase something for yourself or your loved ones for Christmas.  Hurry!  The sale ends on December 18, 2015 at 11:59 p.m.  Offer is good at Wanda Maria Designs on Etsy* and Two Crafty Mules on EBay.  Thank you and happy shopping!!!

* On Etsy, please use coupon code Christmas25

Buttery Caramel Recipe & Tutorial


I love making homemade candy every Christmas.  I also enjoy giving candy away to friends and neighbors as little gifts.

The first couple of years that I made caramel from scratch, it was not a positive experience.  I followed other suggestions I'd found to a "T" for the preparation, but it just didn't work for me.  For example, many recipes suggest using foil to line the caramel pan.  This was a disaster.  The foil, even though it was buttered, stuck to the caramel and it was quite a chore having to pick off the little pieces from the candy.  Ugh.  Then - trying to cut the caramel with a sharp knife was difficult and my hand was really sore by the time I finished.  Through trial and error, I found that when making this type of candy, it is best to ALWAYS use parchment paper to line the pan.  It never sticks to the candy and it can be easily removed in one sheet.  Second, I use a dough scraper (like this one) to cut the caramel into pieces.  It is MUCH easier to cut the caramel, and the little handle on the scraper is easy to grip onto.  Now, caramel making is a more pleasant experience - that's for sure!

Anyway, this is the recipe I use for my caramel.  It is buttery and yummy, and people love it.  Enjoy!

Homemade Buttery Caramel Recipe:

Ingredients:

1 pound of butter (4 sticks)
2 pounds of brown sugar (1 bag)
1/2 teaspoon salt
2 cups light corn syrup
2 cans sweetened condensed milk
1 Tablespoon vanilla
Optional: Chopped walnuts (1-2 cups, as desired)

Directions:

1) Melt butter in a heavy deep pan.


2) Add sugar and salt; stir thoroughly.


3) Stir in corn syrup and mix well.


4) Gradually add milk, stirring constantly.


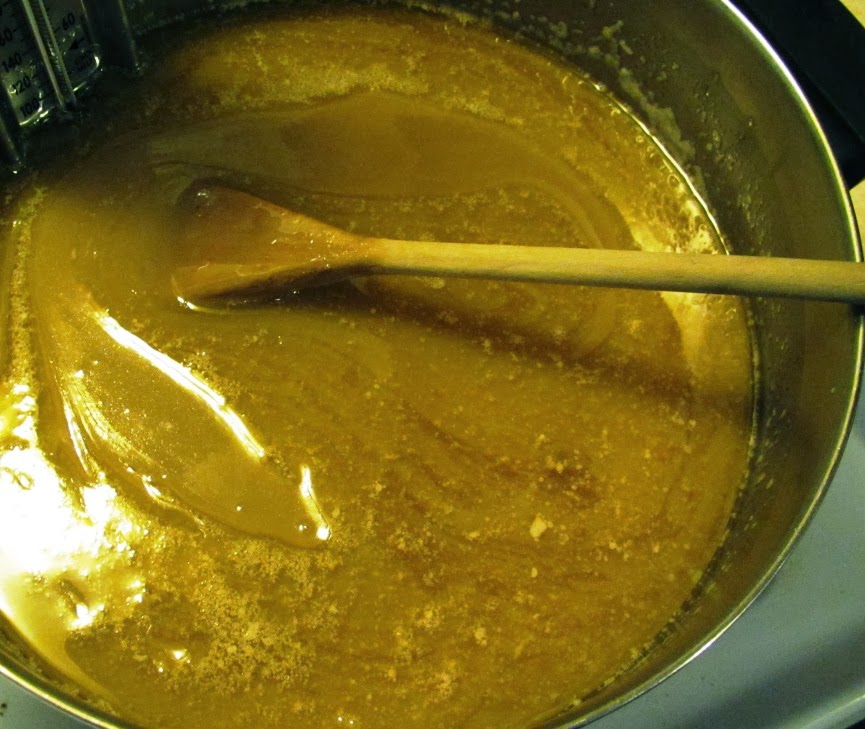
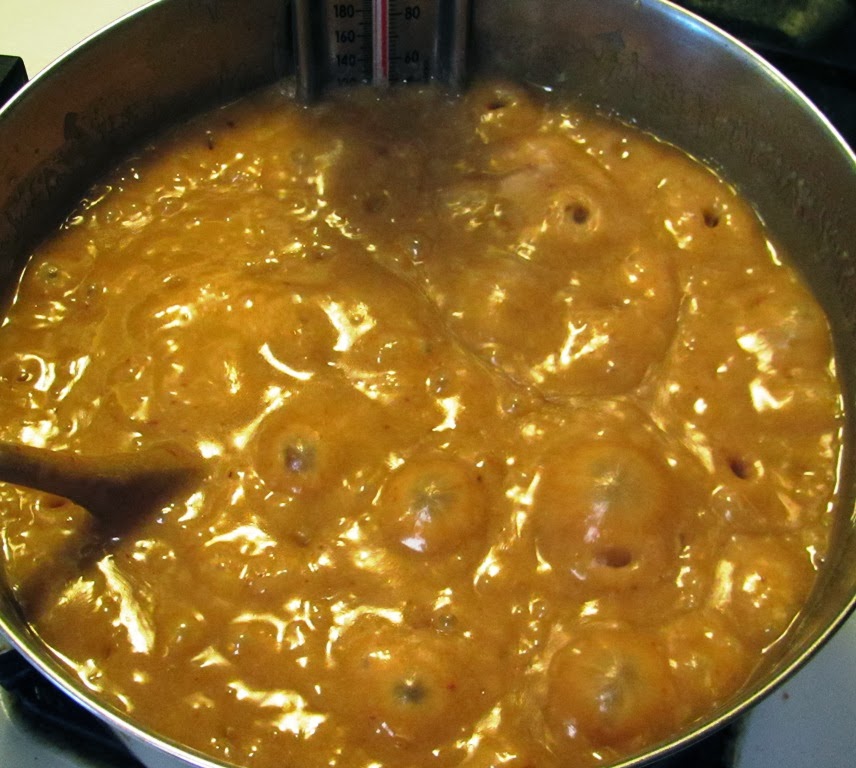
5) Cook and stir over medium heat to firm ball stage (245-250 degrees). This will take approximately 12-15 minutes. I strongly recommend using a candy thermometer to measure the temperature.  The candy stages are usually clearly marked on the thermometer, making the candy "goof-proof" to make.


6) Keep on stirring.  The mixture will be quite bubbly.  When the firm ball temperature is reached, remove pan from heat and stir in vanilla.


7) If desired, nuts may be stirred into candy at this point.  Otherwise, skip this step and go onto step number 8.

8) Pour caramel into a large parchment paper lined pan. (The pan I used was 18" by 13").  Let cool.


9)  Lift the cooled caramel out of pan, picking it up by the parchment paper.  Use the dough cutter to score the candy and cut into squares.  I make all of the cuts in one direction first, then turn the pan 1/4 of a turn and cut the other direction.


10) Separate the caramels and wrap them with cellophane candy wrappers.  I use a 4 1/4" by 4 1/4" size, which seems to be a perfect fit.  I purchased my wrappers from here.


Yield:  Makes 5 pounds of candy, or approximately 135 1-1/2" pieces.

Happy candy making!


$25.00 Gift Certificate Giveaway - and Published in Altered Arts Magazine!


It's so hard to believe today is the last day of November.  It's been such a whirlwind of a year for me between beginning college this past spring (for the first time ever), remodeling my craft studio, working on orders for my jewelry customers and the like.

I have the best customers and blog/Facebook followers.  I really do.  I have met some of the nicest people through my jewelry projects and want to say "thanks" by having a giveaway - just in time for Christmas.

I will be giving away a $25.00 gift certificate to my Etsy shop, Two Crafty Mules.  The gift certificate may be used for any ready-made item in the shop.  It may not be used on custom orders.   You can enter the giveaway by leaving a comment on this blog post, and/or by leaving a comment on the Two Crafty Mules Facebook page under the giveaway post.  Leave one comment on each site, and you will have TWO chances to win!  The deadline to leave comments is Sunday, December 15 at 11:59 p.m.  One lucky winner will be selected on Monday, December 16.  Just in time to shop for Christmas!  WOOT!  Please spread the word - tell your friends, post the giveaway on Pinterest, etc.  An additional prize will be added if we reach comments from 200 people, with additional prizes added for each 100 comments thereafter!  How awesome is that?

So - what are you waiting for?  Let the commenting begin!  :)  Good luck, everyone!

P.S.  While we are talking about freebies - who doesn't love a freebie, especially at this time of year?  One of my Christmas art doll projects is currently featured in the Altered Arts Bonus Christmas 2013 project issue.  The magazine is available for purchase - and - for a limited time only - available for FREE digital download.  Be sure to check it out and get some free Christmas project inspiration while you are at it.


Holiday Tealight Candle Holders Tutorial

I had every intent of blogging this tutorial for Christmas, but, as usual, time got away from me.  This project will have a Valentine's Day spin on it because we are in February (note the first picture shown).  However, the step-by-step tutorial will feature the Christmas items used in other versions of the project.  The beauty of these candles are that they can be used all year long.  Simply empty out the candle base and fill it with something to match the season.  It's really that easy.

Conversation heart candy votive candles


This the candle inspiration used in the DIY tutorial.  Notice that the view changes when you spin the candle around:
Christmas Tealight Holder - view one

Christmas Tealight Holder - view two


Without further ado, here are the instructions to make your own holiday tealight candle holder.

Supplies:

Bubble candle holder
Tealight candle holder
Tealight candle
Decorative contents for inside of the candle holder base.  I used Christmas picks and sprigs for the tutorial, but you can use other things that appeal to you (such as mini light bulbs, conversation heart candies, pearls, lace, tinsel, silk flowers and other small items).
Wire cutters/pliers (for trimming sprigs)

Instructions:

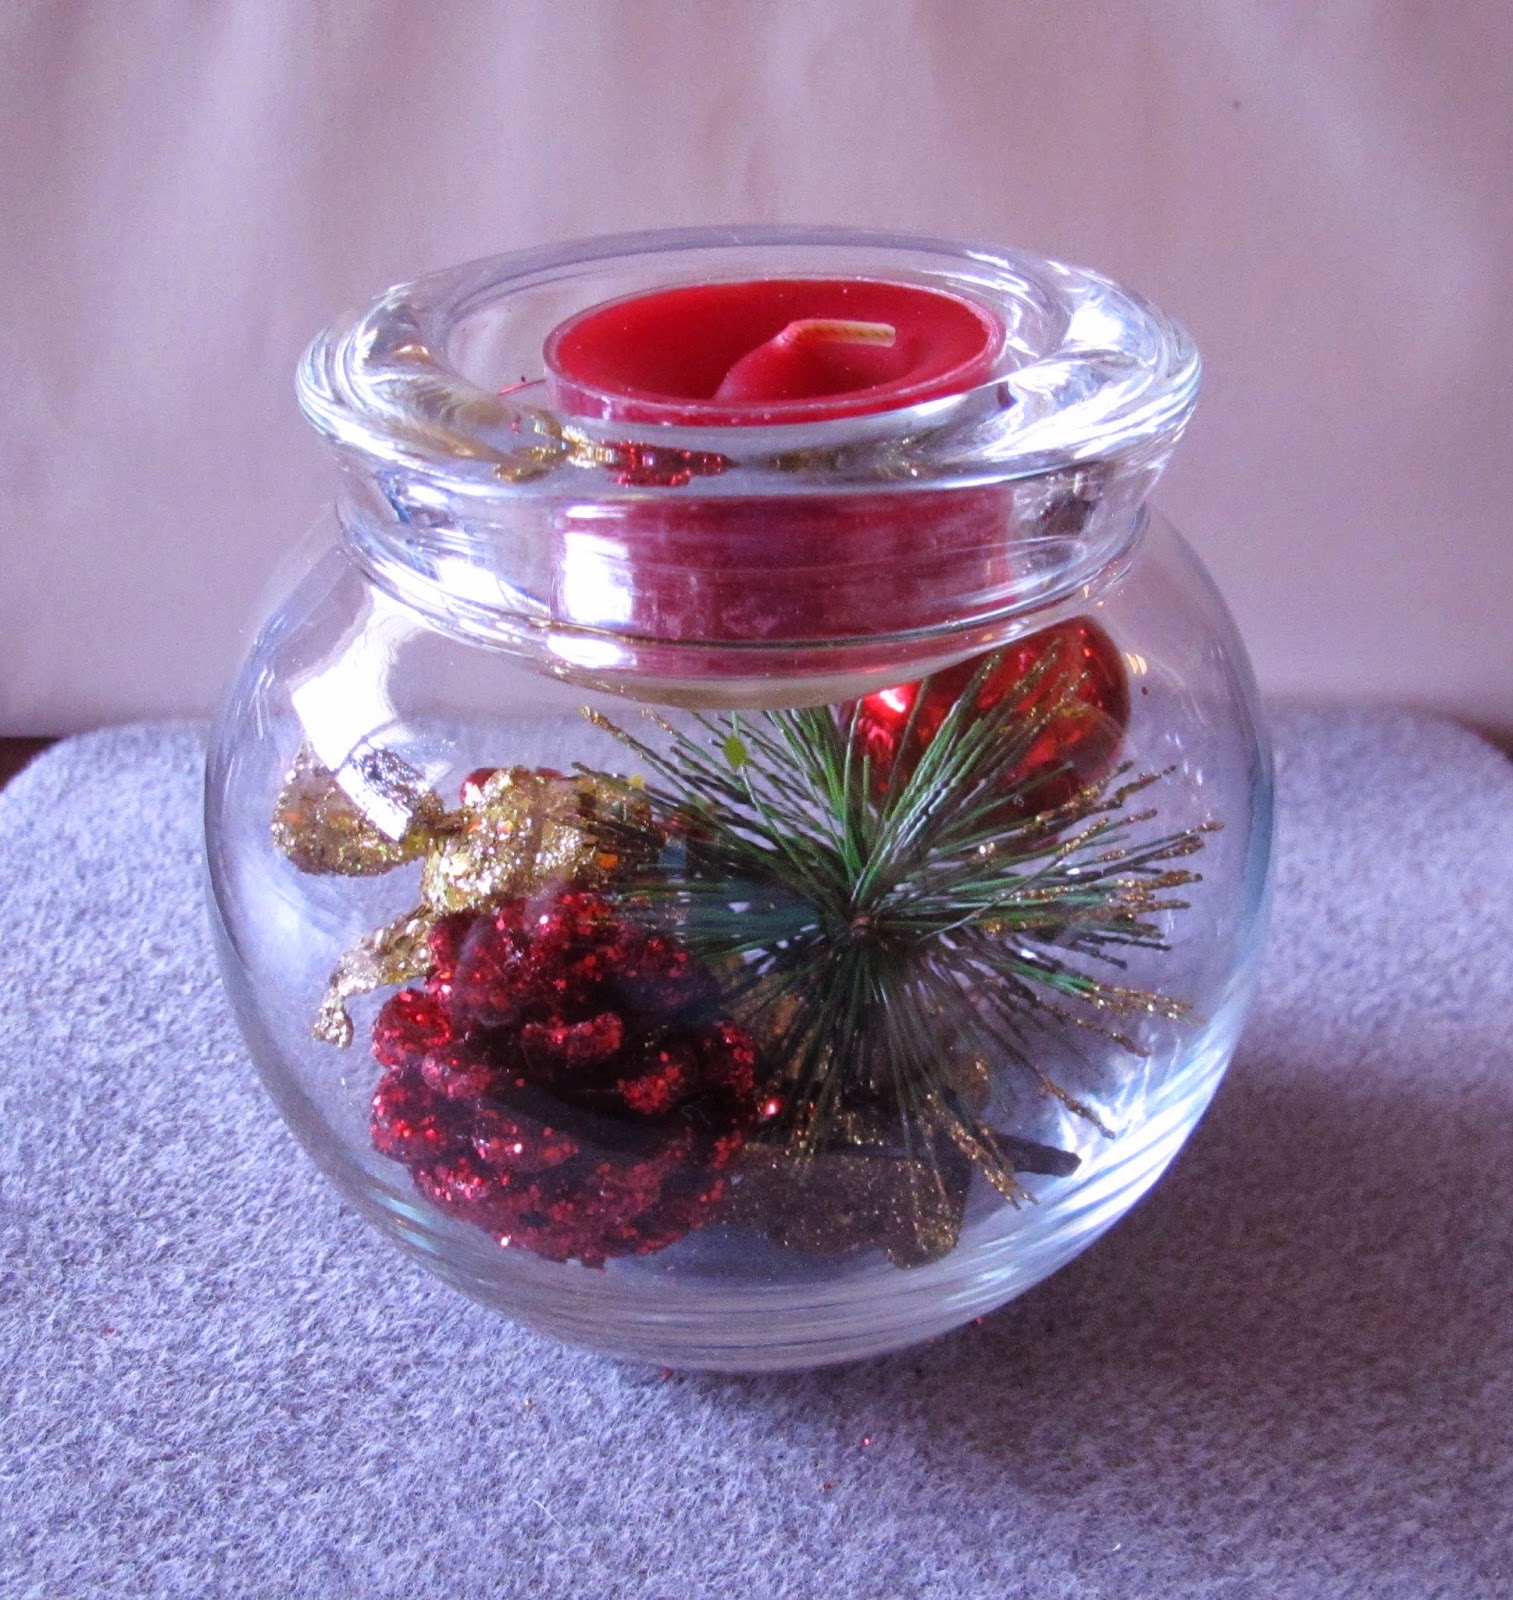
1) Make sure the tealight holder fits nicely on top of the bubble candle holder.  It should slip into place without falling inside.


2) Set the tealight holder aside.  Pick up the desired sprig, and cut off a small piece.  Set it inside of the bubble candle holder.  Keep going until you have an eye-appealing arrangement inside of your candle holder.  When you are done arranging, set your tealight holder on top of the candle holder and that's it - you are done!


The completed candle holders! Aren't they awesome?


I made and gave away several of these tealight holders for Christmas.  People really loved them.  Here are some other candle holders I made for some added inspiration:

These feature mini lightbulb ornaments. I bought a little package of them at the dollar store:

Mini light bulb ornaments candle holders.

Mini light bulb ornaments candle holders.

The little package of bulbs I purchased from the dollar store.
 
You can use the basic concept of this project with other shapes and sizes of candle holders.  I purchased this set of holders from PartyLite and filled them with pearls, shiny plastic hearts and stems of mini roses for my Valentine's Day decor:


And here are the same set of candle holders with a blue Christmas spin on them.  I used tinsel and mini star and metallic ball ornaments to fill the bases of the candle holders:


The possibilities for filling these with all sorts of goodies are endless. If you feel inclined, please send me pictures of your own versions of these candles.  I'd love to see what you come up with!

Candyland Gingerbread Loaded Charm Bracelets for 2013

Ever since I designed my first Candyland bracelet in 2006, they have been a favorite of my customers.   They are - without a doubt - my most popular item during the Christmas season.  In fact, I received several requests from customers this summer who were waiting for the new ones to be posted.  Good news!  They are here - but for a limited time only.  Here are some pics of the completed bracelets:


The bracelets are posted to both EBay and Etsy (in case you only shop at one or the other.)

Sweet dreams!