1-Wanda-craftymule-navbar-message
Showing posts with label food. Show all posts

Thursday, October 11, 2018

Mexican Shrimp Ceviche Recipe and Tutorial

Recently, I began another quest to eat healthier and lose weight.  I refuse to follow a tasteless diet regimen and give up flavor in an effort to achieve my goals.  So, I always find a way to include delicious food in my regular eating plan.  Why sacrifice taste when you don't have to?  And - I must be doing something right.  In a two week period, I have dropped 18 1/2 pounds.  I don't feel like I am missing out on anything, and I am not starving myself.  The recipe and tutorial below is one of my favorite foods to eat when I opt to eat healthier.  It is reminiscent of the shrimp ceviche you can find at any good Mexican restaurant.  The best news is you can make a big batch of this for a fraction of the cost of what you would pay in a Mexican restaurant.  It is a win-win from every aspect. :)

Two Crafty Mules - Mexican Shrimp Ceviche Recipe

 I should mention that the recipe below is my own, based upon my personal preferences.  For example, I did not utilize a whole onion in this recipe, because I didn't want the onion flavor to overpower the taste of the recipe.  You may elect to use a whole onion.  It's up to you.  Either way,  I encourage you to alter the recipe to meet your own preferences. 

MEXICAN SHRIMP CEVICHE RECIPE AND TUTORIAL


INGREDIENTS:


12 oz Shrimp, Extra Small, Frozen, Cooked and Defrosted
1 large green bell pepper
1/2 large onion, raw
1 1/2 cups tomato (about 2 large or 3 medium-sized tomatoes)
2 avocados, peeled and pitted
1 bunch cilantro, fresh
1 jalapeno pepper
1 lime
3 tsp oregano, dried 
1 7 ounce can salsa (I used Herdez Salsa Casera)
Seasoned salt (to taste)

 DIRECTIONS:


1) Chop bell pepper into small pieces.  Put pieces into a large bowl.


2) Dice onion into small pieces. Add to large bowl.


3) Chop tomatoes; add to bowl.


4) Dice jalapeno pepper into finely chopped pieces.  If you want your ceviche to have a spicier taste, leave in the seeds.  If you desire a milder ceviche, discard the seeds.  Add to bowl.


5) Cut the avocado into bite-sized pieces.  Keep in mind that these will break down somewhat when the ceviche is refrigerated.  Add to bowl.


6) Chop cilantro into small pieces using a knife, or kitchen shears.  Add to bowl.


7) Add defrosted shrimp to the bowl; mix all ingredients together.


8) Cut the lime in half.   Squeeze the juice of both halves over the ceviche.


9)  Mix the can of salsa into the ceviche.


10) Season the ceviche with seasoned salt (to taste) and dried oregano.  Mix well.  Cover bowl and place it into the refrigerator, allowing it to sit for a minimum of one hour in order for the flavors to meld together.  This is delicious served with saltine crackers.  Enjoy!!!


Wednesday, October 10, 2018

Polymer Clay Chocolate Bunnies and Peeps Easter Jewelry!

Over the past couple of weeks, I have been working on some brand new Easter jewelry designs - all made from polymer clay.  (Yes, Easter is early this year - it falls on March 27th - next month!)  The designs include little "chocolate" Easter bunnies, white "chocolate" bunnies (as not everyone likes chocolate) and "marshmallow" Peeps. For a sneak peek of these items in process, please check out my Instagram page.

Here are some of my latest designs - all of which will be posted to my Etsy shop this week:

Chocolate bunny and roses Easter bracelet.

Chocolate Easter bunny necklace.

Chocolate bunny Easter necklace and earrings set.

Chocolate bunny Easter bracelet.

White chocolate Easter bunny bracelet.

White chocolate Easter bunny bracelet.

White chocolate Easter bunny earrings in two sizes.

Peeps Easter jewelry.

Peeps Easter jewelry.


Buttery Caramel Recipe & Tutorial


I love making homemade candy every Christmas.  I also enjoy giving candy away to friends and neighbors as little gifts.

The first couple of years that I made caramel from scratch, it was not a positive experience.  I followed other suggestions I'd found to a "T" for the preparation, but it just didn't work for me.  For example, many recipes suggest using foil to line the caramel pan.  This was a disaster.  The foil, even though it was buttered, stuck to the caramel and it was quite a chore having to pick off the little pieces from the candy.  Ugh.  Then - trying to cut the caramel with a sharp knife was difficult and my hand was really sore by the time I finished.  Through trial and error, I found that when making this type of candy, it is best to ALWAYS use parchment paper to line the pan.  It never sticks to the candy and it can be easily removed in one sheet.  Second, I use a dough scraper (like this one) to cut the caramel into pieces.  It is MUCH easier to cut the caramel, and the little handle on the scraper is easy to grip onto.  Now, caramel making is a more pleasant experience - that's for sure!

Anyway, this is the recipe I use for my caramel.  It is buttery and yummy, and people love it.  Enjoy!

Homemade Buttery Caramel Recipe:

Ingredients:

1 pound of butter (4 sticks)
2 pounds of brown sugar (1 bag)
1/2 teaspoon salt
2 cups light corn syrup
2 cans sweetened condensed milk
1 Tablespoon vanilla
Optional: Chopped walnuts (1-2 cups, as desired)

Directions:

1) Melt butter in a heavy deep pan.


2) Add sugar and salt; stir thoroughly.


3) Stir in corn syrup and mix well.


4) Gradually add milk, stirring constantly.


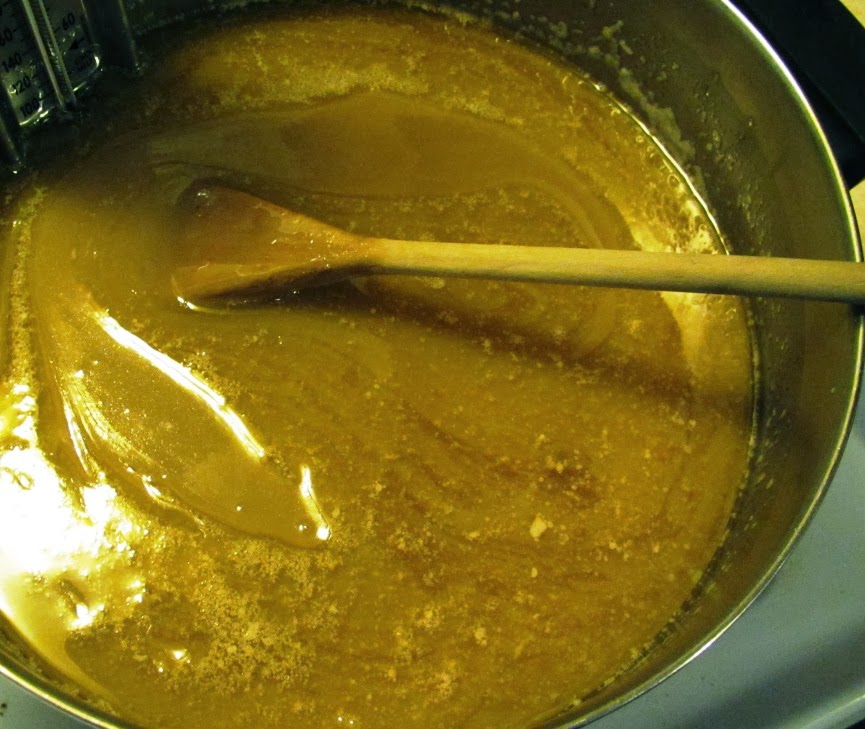
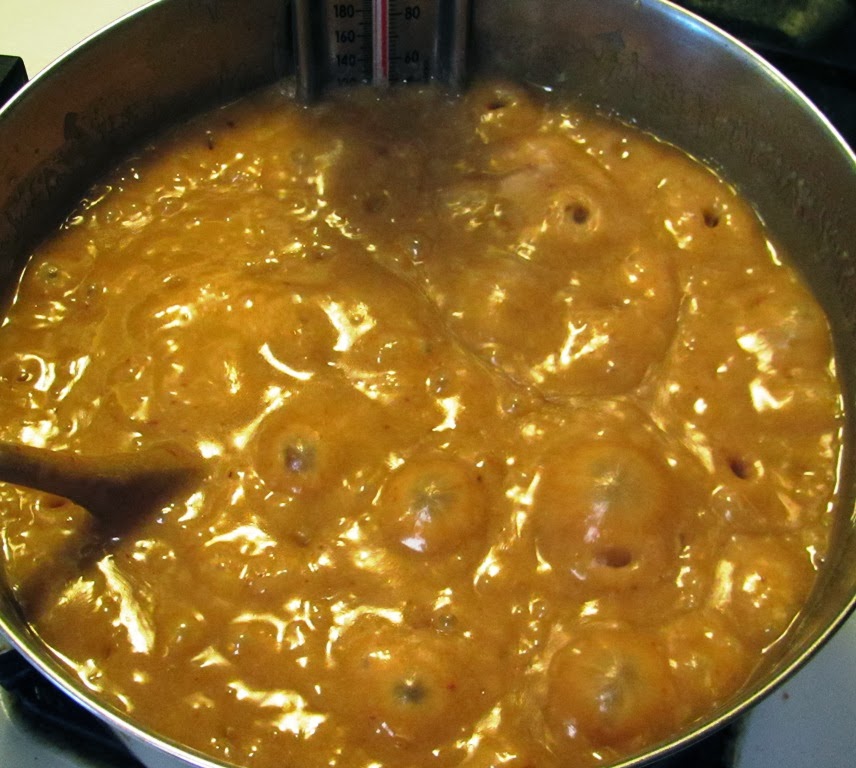
5) Cook and stir over medium heat to firm ball stage (245-250 degrees). This will take approximately 12-15 minutes. I strongly recommend using a candy thermometer to measure the temperature.  The candy stages are usually clearly marked on the thermometer, making the candy "goof-proof" to make.


6) Keep on stirring.  The mixture will be quite bubbly.  When the firm ball temperature is reached, remove pan from heat and stir in vanilla.


7) If desired, nuts may be stirred into candy at this point.  Otherwise, skip this step and go onto step number 8.

8) Pour caramel into a large parchment paper lined pan. (The pan I used was 18" by 13").  Let cool.


9)  Lift the cooled caramel out of pan, picking it up by the parchment paper.  Use the dough cutter to score the candy and cut into squares.  I make all of the cuts in one direction first, then turn the pan 1/4 of a turn and cut the other direction.


10) Separate the caramels and wrap them with cellophane candy wrappers.  I use a 4 1/4" by 4 1/4" size, which seems to be a perfect fit.  I purchased my wrappers from here.


Yield:  Makes 5 pounds of candy, or approximately 135 1-1/2" pieces.

Happy candy making!


Life Got in the Way - But I'm Back!


It's hard to believe that my last blog post was in September at the time I departed for my long-awaited trip to Italy.  I apologize for my absence in blogger-land.  I have absolutely no excuse for this except for the fact that life got in the way.
 
That's not necessarily a bad thing.  I came home from Italy to find my sweet husband had surprised me by giving our home a much-needed update.  With the help of my son, Joey and daughter-in-law, Hailey, he repainted our bedroom, replaced all of the carpeting in the house with new carpeting in the bedrooms and wood flooring in the hallway and living room areas.  I'd been wanting wood floors in our home for a long time, and I was thrilled to come home to find all of the beautiful changes.  In addition, I was swamped with jewelry orders for November Confirmations and the Christmas holiday.  (Not that I mind - I love making jewelry, as you know! ;) )  Last, but certainly not least, for the first time in over 30 years, I stopped working full time.  I am working a part-time job now, and I began going to college as a full-time student.  I graduated from high school 30 years ago, so this is a huge adjustment for me.  My latest endeavor has me determined to earn my four year degree in three years, so I will be attending college full-time and during the summer to achieve this goal.  Wish me luck!

Anyway - to get back on track - we had a wonderful vacation.  I learned a lot during our trip, and I'm longing to go again in the near future.  I absolutely fell in love with Italy and her wonderful people.  It truly was the trip of my dreams and I cannot wait to do it all again.

I'm planning to share my experiences and photos from beautiful Italy with you here on my blog.  There's a lot to cover, so I will do it in increments.  In addition, I want to share other information here with you.  I have a lot of catching up to do, so let's get started.

Our trip began in Rome.  We stayed at a hotel called "Hotel de Monti".  It is in a convenient location - right down the street from the Santa Maria Maggiore Basilica and walking distance from the Termini train station.  The hotel has a wonderful continental breakfast which is included in the room rate.  Each morning, we dined on our choice of various meats, cheeses, fruit, juices and beverages.  There is nothing quite as delicious as fresh squeezed blood-orange juice, homemade Formaggio cheese, prosciutto, croissants, biscotti and cappuccino for breakfast (among other things).


Here is a view of the street where our hotel was located.  In the center of the picture, you can see Santa Maria Maggiore.  It's not the best picture, but it was quite rainy in Rome that day.  And by quite rainy, I mean we ended up getting soaked.  But it was well worth it.  You don't get to see Italy every day, you know.


After we checked into our hotel, we wandered around our neighborhood and enjoyed all that Rome had to offer.  We stopped for lunch at a cool little restaurant called "La Carbonara."  The food was delicious and lots of locals eat there, which is a good sign.  Plus, they have a great sense of humor.  Check out this little card which was on our table:


After lunch, we walked over to Santa Maria Maggiore.  It is such a beautiful church - quite ornate, as they all appear to be in Italy.


Trip to Chicago - Grandmother's Garden Quilt and Imported Food Galore!

Last week, I was in Chicago helping my family care for my uncle who had surgery. Along with other family members, I stayed long hours at the hospital. True to form, I can never just sit still and relax. I always have to be doing something. I decided to spend my time working on a Grandmother's garden quilt I had started many years ago. This little quilt is made from dime-sized hexagons. Because it is so small, it is easy to transport, so I usually work on this project when I travel. Here are some pictures of my little quilt-in-progress:

Since I only work on this quilt when I travel, I may end up making it into a little wall hanging instead of a full sized quilt so I can complete it in my lifetime. Only time will tell...

On another note, I was born in Chicago and I lived there until I was eight years old.  Because I still have family there, I like to visit there every now and then.  One of my favorite things about Chicago (besides my family, of course) is the vast assortment of ethnic food available to consumers.  You name it - they've got it - regardless of the culture.

One of my favorite places to shop at is the Eurofresh Market in Palatine, a suburb of Chicago.  This store absolutely fascinates me because it literally carries food and ingredients from all over the world.  I can easily find things there that used to be prepared by my beloved Polish-German grandmother when I was a child.  These things always evoke great memories of my childhood.  Needless to say, I couldn't resist taking pictures while in the store.  Here are some pretty cool finds at the market:

Packages of sauerkraut imported from Poland. Who would have thought there were so many varieties?

Matzo ball soup mix made by Lipton.  Who knew???

Seasoning mixes from Poland for every kind of dish imaginable.

A full aisle dedicated to olive oil from Italy and all sorts of vinegars known to man. Amazing!

And let's not forget the magazine section so you can keep up on all of the latest news and gossip.

I ended up buying way too much store while visiting Eurofresh, but hey, a girl's got to do what a girl's got to do, right?  Here's just a sampling of what I purchased:

Chocolate from Poland.


Coffee from Germany.

Seasoning mixes from Pakistan to make chicken curry and from Poland to make stuffed peppers and cabbage.  (My mouth is watering just thinking about it...)

Mustard from Poland to go with all of the deli meat I purchased.

Vanilla sauce mix, vanilla sugar, vanilla and almond extracts from Europe just in time for my holiday baking.  Can you tell I LOVE vanilla?

Thanks for letting me share my adventures with you.  Be sure to check back regularly. I have some awesome handmade Christmas projects and tutorials I will be sharing here over the next month. :)

Pin It